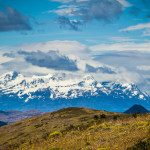
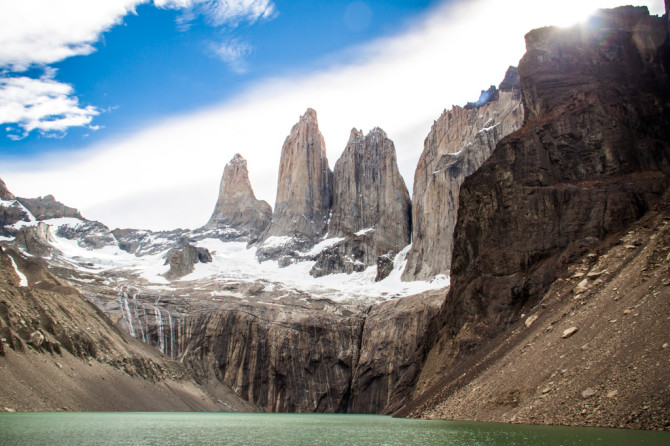
Torres Del Paine National Park, a backpackers and trekkers dream come true, right?! Well we sure missed the memo… We hadn’t even heard of the Torres Del Paine National Park in Chile before we arrived to Punta Arenas. But hey, who said you have to plan your trip before you leave, right?
We were talking to some locals in central Chile who tried convincing us Torres del Paine was a pretty cool place to go hiking. We thought they were just being partial to their country and didn’t want us to spend time in the neighboring Argentina. We read up on it in a few guide books and decided that we should definitely check it out and hike the “W”. The more we read about it, the more excited we were! The “W” is a 90km (50 mile) hike that winds around some of the most beautiful mountains and scenery we have ever seen!

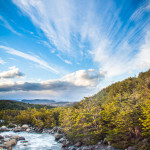
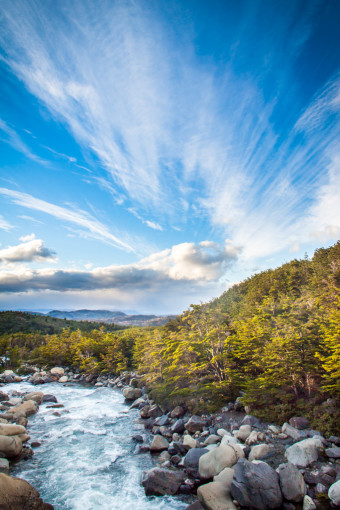
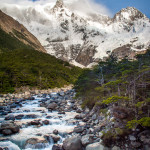
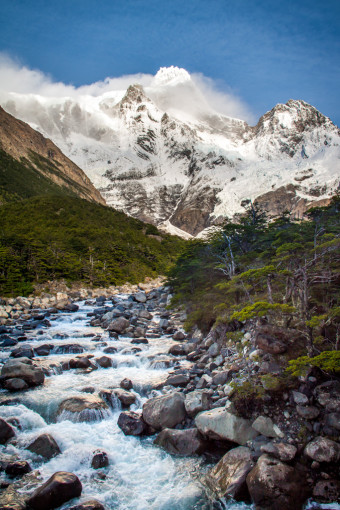
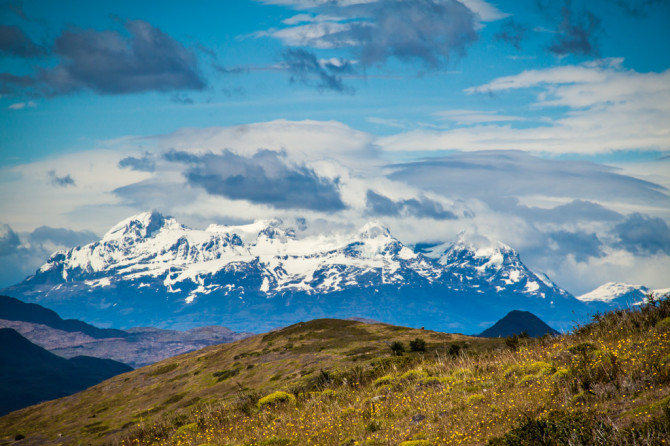
It was some of the most pristine wilderness I’ve ever had the chance to hike through! Everything was so clear, clean, and beautiful. You could even drink the water right from the streams without filtering it – incredible!
Different Ways to Hike the Torres del Paine Trails
We were excited to do some hiking and camping on this trip, and it happens to be the cheaper option, so that was an obvious choice for us. There are other ways to go about it though – from renting a sleeping bag and tent at each campground to staying at a beautiful full-service lodge with room service. A few of the trails allow you to ride horses part way, if you’re into that.

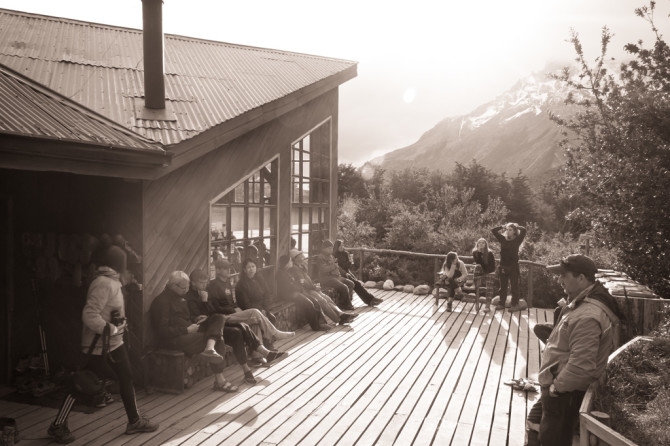
Most of the campgrounds had a few dorms or private rooms (some with jacuzzis!) that hikers could rent if they didn’t want to carry a big backpack the whole way. There were snacks and sometimes hot meals you could order from a restaurant too! Be prepared for Disneyland-food prices.
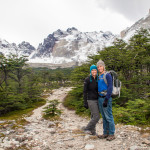
Many hikers we met on the trail only carried a daypack with just a raincoat and some snacks with them as they went from lodge to lodge. This is a great way for anybody to enjoy the Torres del Paine, not just the hardcore campers.
Torres Del Paine National Park Trekking
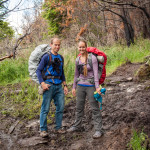
A few months ago, we never had any idea that we would be hiking 50 MILES!! Oh. my. goodness. Everyone who had already hiked it was so casual about hiking a 5 day, 50 mile trip – like there was a porter included to carry your pack when you got tired. Nay nay!

The inevitable next question from everyone we met was, “So, are you hiking the full loop, or just the W?” The full loop included the normal “W” hike and then also went around the back of the mountains. It added another 3 days and 30-ish miles onto the trek.
Well, we were thinking about doing the full trail, buuut a few days before we headed out there was a thumper of a snowstorm and they had to airlift a few hikers out with a helicopter. They said there was chest-deep snow. Besides, they closed the trail so we couldn’t have gone anyways…
Torres del Paine Weather
The mileage wasn’t really as bad as was coping with the weather with our non-hiking gear. The weather in Patagonia ranges from sunny and warm to super windy and sleeting snow – all in the same hour. All the weather forcasts at the ranger stations included rain/sun, temperature, and wind speed! I’ve never been in such a windy place! One time Alyssa was thrown off the trail by a gust. After that we were really careful if the trail was next to a cliff or steep hill!
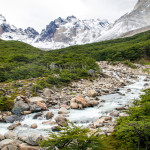
The other thing we could count on was that every single trail was muddy! If we didn’t have waterproof hiking boots, we would have been toast. A few miles of the trails simply followed a stream. If you thought you had lost the trail, just follow the stream and you’d be going in the right direction.
Not to mention we were in Patagonia so I mean that’s practically Antarctica, so it was COLD! Brr!

BUT…we had an absolute blast! We met tons to super cool people, saw Mother Nature at her absolute best, and would totally recommend anyone to do it! It was a huge accomplishment!
We especially felt so because everyone else who was there had planned their trip halfway around the world specifically to do this hike and we, um, just kinda showed up with heavy, rented gear. It was our longest continuous camping/hiking trip (5 days) yet, so when we finished with blisters and all, we felt like we rocked it :)
Trek Planning – Which Direction to Hike the “W”?
Most people start the hike at the Torres and then wind around the “W” to the left – counterclockwise. We decided to do it in the opposite direction because people had told us the views were better from that direction (and maybe because we like doing things differently).
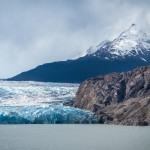
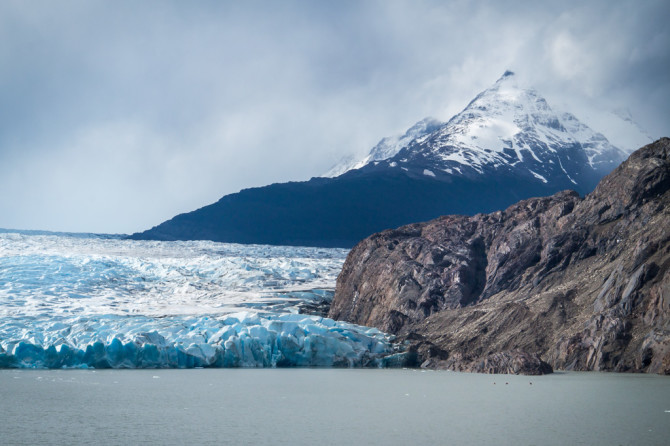
So, we took the bus to the ferry (at the end of the bus route) and then took the ferry to the trailhead for the campground near Glacier Grey. It was so amazing topping the mountain that afternoon and seeing the enormous glacier. It’s a breathtaking experience! More on our itinerary later.

Hiking the “W” – What to Pack
Since we weren’t planning on doing much hiking, trekking, or camping on our trip, we didn’t have everything we needed for this hike with us. We contemplated buying 2 cheapo sleeping bags and a tent, even if we had to donate it to someone at the end. The trouble was, our packs weren’t big enough for some bulky sleeping bags, and traveling with a lot of gear is just a big pain! So, we decided to rent some halfway decent gear from Puerto Natales, the last town before starting the trek.
We were really irritated because we have nice camping gear at home in the US that would have been perfect, but that didn’t help us here…
You Need Waterproof Shoes
 The one thing we did buy were some nice Columbia waterproof shoes
. We were not prepared at all for this hike so we ditched all our other shoes we had and just used our waterproof ones from then on. We are so glad we did because the trails were really wet!
One word from the wise – if you need new shoes, buy them at least a week (or a month) before you go so you can break them in. Wear them as much as you can, even around your hostel and on the bus. We only had a few days to break ours in, so Alyssa got quite the blister collection by the end!
Gear Rental in Puerto Natales
The place we rented our gear from is called Base Camp, next to and owned by Erratic Rock, right by the main plaza in Puerto Natales. The gear was pretty good and at a reasonable rate, we thought. They had run out of backpacks, boots, and a few other rentals (that we thankfully didn’t need), so call ahead or reserve if you will need to rent everything. There are loads of other places that rent gear in town if you need more things.
Base Camp has a nice map of the Torres Del Pain National Park and is a great hang out area to meet other hikers before you leave.
List of What We Rented:
- 1 – 2 person tent
- 2 – sleeping bags
- 2 – rain jackets
- 1 – stove (we bought one fuel canister, and it was plenty)
- 1 – pot
- 1 – plastic cup (we had our own silverware and pocketknife)
It all totaled out to about $180 for 5 days of camping for 2 people. It averages out to $18 per person per day. It was a little expensive but it saved us the hassle of needing to carry everything with us or having to put up with cheapo gear of we bought ourselves. For the experience it was totally worth it!
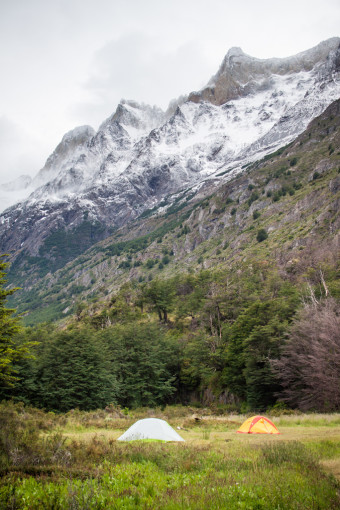
The night before we planned to leave for the trek we stayed at a cheap camping area so we were able to try out our rented gear before we actually left. This helped us look for any problems with the rented gear or holes in the tent floor beforehand. It was good practice to learn how to set up the tent before having to do it at night in the rain the first night! We actually learned that our rented tent hoop pole had to go forward, not backward – who’d have known – with all the extra loops and pole-holes the tent had…

We met some travelers who had brought their own gear for a few hikes in the lake district where there is good camping, Then, after they moved on from this area they would ship their gear home so they didn’t have to carry it for the rest of the trip around South America. This might be a good idea for some but the shipping is expensive, and chancy to give pricey things to the post office.
Food
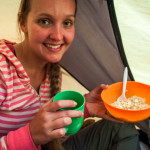
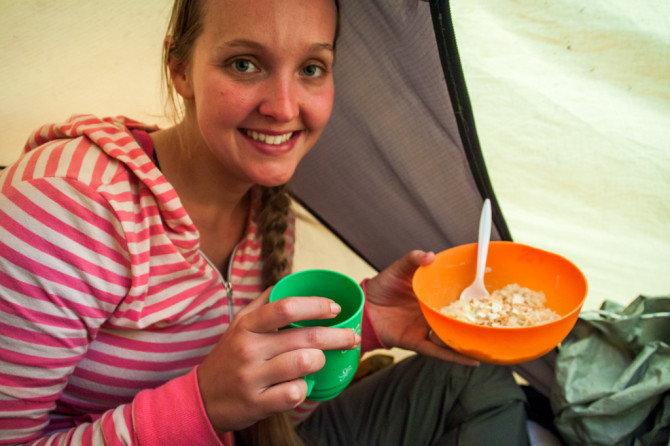
We planned for 5 days and 4 nights on the trail, and even tried to make it luxurious by splurging on hot spaghetti dinners and cocoa each night! Since we were less prepared than our fellow hikers with their dried fruit and beef jerky, we had to make do with what we found in town to bring with us.
Our suppers alternated between:
- Half bag (a local bag was 400g) of pasta noodles and a ~250g sauce packet
- Half bag of noodles and a soup packet mixed with water
- and usually hot Cocoa
 Our lunches and snacks had:
- Avocado sandwich with cheese and tomato slices
- Apple
- Hard-boiled egg
- Crackers
- Cookies
Our breakfasts usually were quick so we could get on the trail:
- Granola cereal
- Oatmeal squares cereal
- Hard-boiled egg
As you can see, this certainly wasn’t the lightest packing list in town, but it was cheap, filling, and wouldn’t spoil in 5 days. We were excited for each meal because it would make one of our backpacks lighter by a pound! There were a few local shops that had dried fruit, but we only found them after we came back :) We actually brought exactly as much food as we needed, and returned to town with only a few crackers left.

Don’t Forget These Things:
- Toilet paper (all the campgrounds have bathrooms)
- Hat & Sunscreen
- Beanie & Gloves
- Waterproof shoes, jacket, and backpack cover
- Wicking (non-cotton) clothes and socks
- Extra money for the park entrance and food you may buy in the lodges
- Pocket knife
- Duct Tape, band-aids, and moleskin for blisters (we used all 3 for our blisters!)
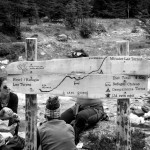
- Map – Click here to download a detailed map.
- Camera
What to Leave Behind
The best advice we heard was to only carry with us what we would need on this hiking trip, and not everything in our backpacks. The place in Puerto Natales where we camped at let us store our extra things (in a separate backpack) in a locked room for free. We were a little leery about leaving behind our electronics, but nothing was touched when we returned almost a week later.
Here are a few things we didn’t bother bringing:
- Water filter, purification tablets, or big nalgene water bottles. The stream water is pure throughout the park, so just dip and gulp. We only needed to carry about a liter for both of us between stream re-fills, which really helped lighten our pack! Be smart and scoop from the water upstream of trail crossings and bathrooms.
- Umbrella – unless it’s rated for 60+ MPH wind gusts
- Phone – unplug. Good luck getting service out there.
- Extra fuel can for your stove. We only used about half of a small canister for 2 people for 5 days
- Cotton socks – find some wool ones because your feet will get wet.
Itinerary Overview for our Hike at Torres Del Paine National Park:
Day 1:

- Bus ride to Torres Del Paine (2 hours from Puerto Natales, $25/person round trip)
- Everyone stopped to pay park fee and watch safety video. We paid $35/person. Locals and some other nationalities get in cheaper.
- Took a ferry ride on west side of bus route with goal of camping at Grey Lake – $23/person one way
- Actually started hiking around 1-2 pm
- 5-6 hour hike to Camp Grey and then we explored the Grey Glacier
- Camp Grey charged ~$8 per person

Day 2:
- Hiked from Camp Grey to Italiano campground (9 hours)
- Camped at Italiano (free campground)

Day 3:
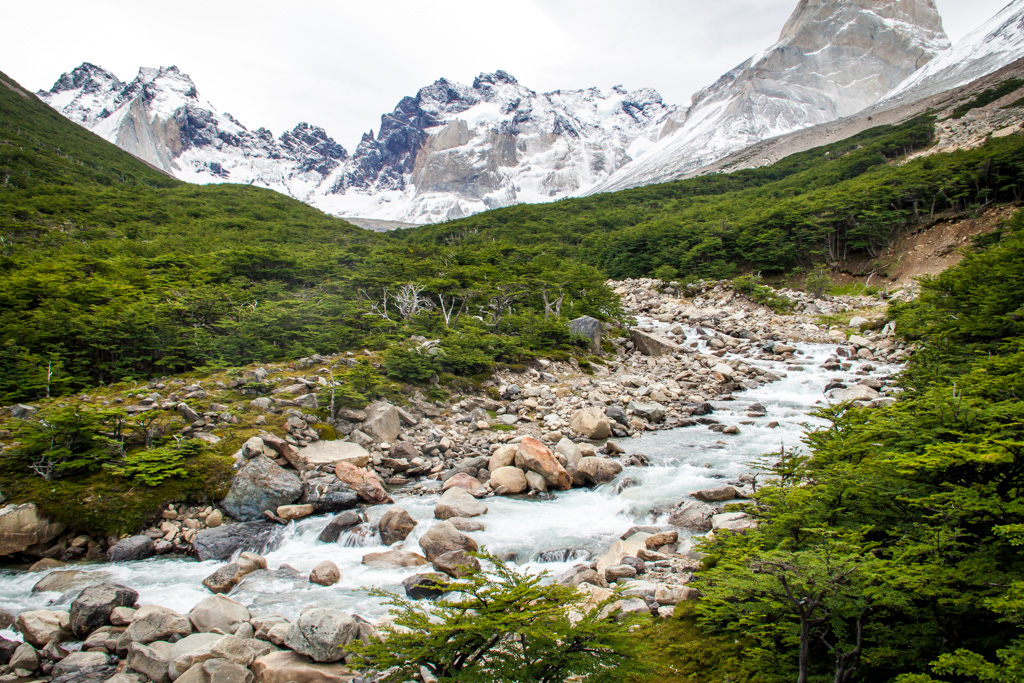
- Hiked up Valle del Francés up the middle of the “W” from Italiano campground (2-3 hours) Started early and only brought a small daypack with snacks.
- Returned to Italiano campground and packed up gear
- Hiked to Campground Los Cuernos (2-3 hours)
- Campground Los Cuernos charged ~$12 per person

Day 4:
- Early morning hike out to Camp Torres – (8 hours) Trail can be really windy!
- I hiked up to the famous Torres del Paine for a sunset view while Alyssa sawed logs in the tent.
- Camped at Torres (free campsite)

Day 5:
- Woke up at 3:30am to catch the sunrise light on the Torres del Paine. Only brought a small daypack.
- Packed up things and hiked to the hotel entrance (3-4 hours)
- Walked 8km to the bus pickup at the park entrance. Most people paid for a shuttle. Be sure to remember what time your shuttle will come by since there are only a few shuttles at certain times during the day.

Torres del Paine – Lessons Learned:
A few things we wish we would have known or we were glad we learned beforehand.
 On the first day, you don’t actually start hiking until well past noon. Don’t plan to make it halfway along the trail on your first day of hiking
- There’s plenty of pure water, so lighten your load and carry as little water as possible. Drink a lot at each stream crossing.
- Plan for rain or snow every day. Smile if it rains, and smile if it’s sunny – you’re in Patagonia!
- Bring waterproof shoes
- Stake your tent down well. The wind is no joke.
- The sun stays up really late in their summer. It went down around 9-10pm for us, depending on how tall the mountains were around us.
- Nothing is cheap, and the rooms in Puerto Natales fill up during high season (December – March), so plan ahead and reserve if you’re short on time. On that note, buy your bus tickets early as they also fill up.
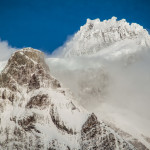
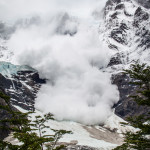
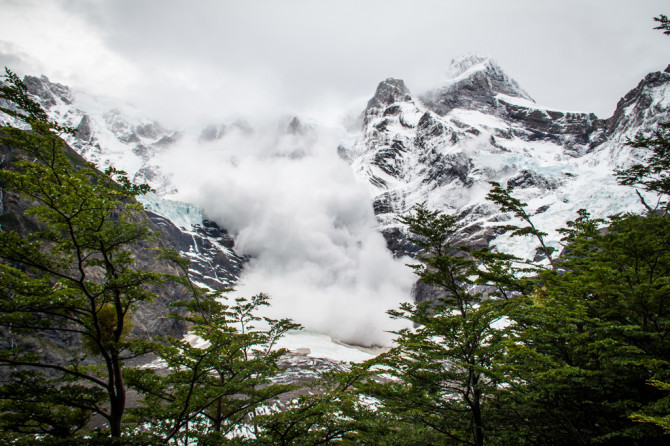
Favorite Sight From Our Whole Torres del Paine Trip – An Avalanche!

Torres del Paine Avalanche in Valle del Frances
This trek was our favorite part of Chile! It has an incredible majestic landscape around every bend in the trail that makes it a very rewarding trek! Torres Del Paine National Park is really a hidden gem!
A Few of Our Favorite Photos From Torres del Paine National Park
-
- Amazing Sky
-
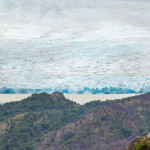
- Grey Iceberg and Mountains
-
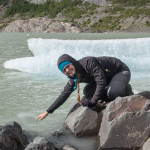
- Alyssa Touching a Small Iceberg

-
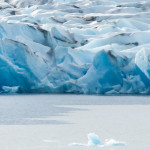
- Landon Excited About Seeing the Grey Glacier
-
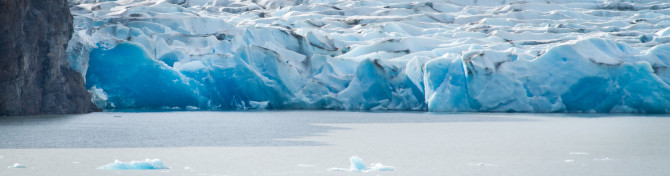
- Deep Blue Iceberg Colors
-
- Snow Covered Mountains at Torres del Paine
-
- River in Valle del Frances

-
- Valle del Frances
-
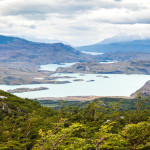
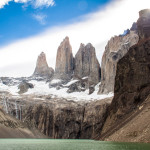
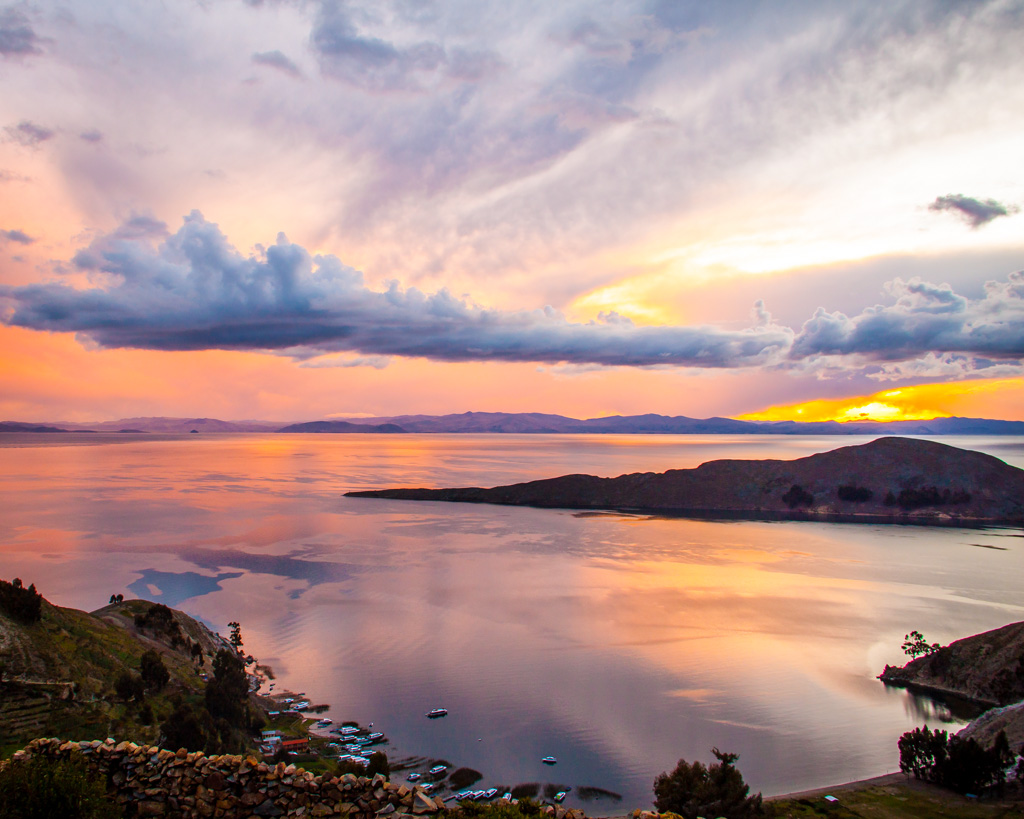
- Torres del Paine Overlooking Lake
-
- Avalanche in Valle del Frances
-
- Torres del Paine Mountains and River
-
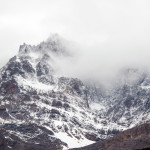
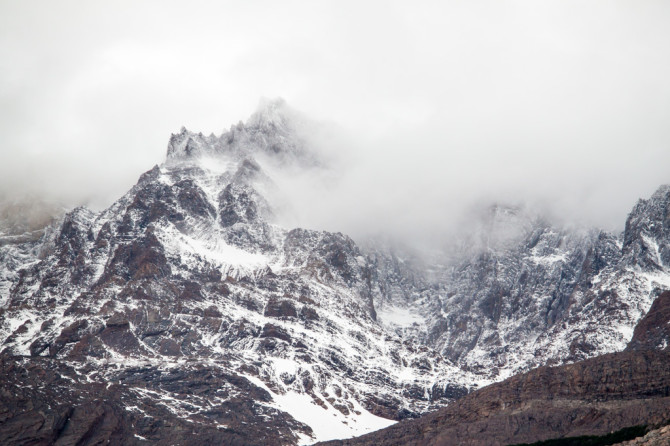
- Torres del Paine Mountain in Fog
-
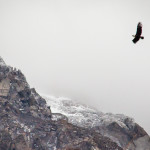
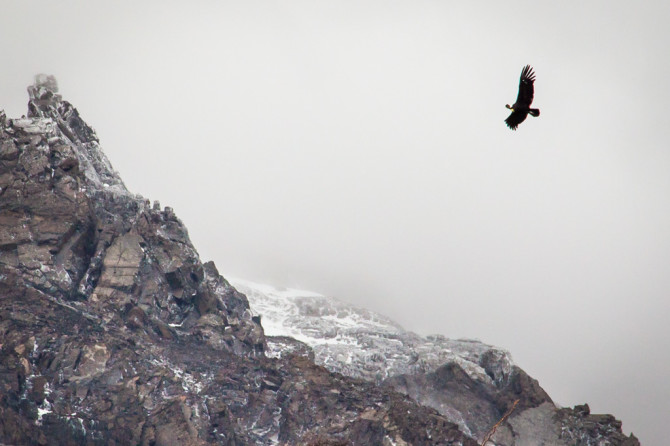
- Bird Flying over Torres del Paine Mountains
-
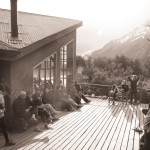
- Lodge Relaxing
-
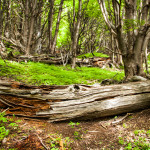
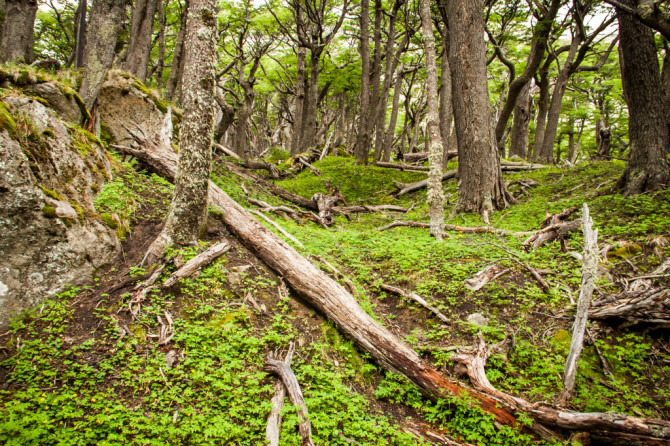
- Log in the Forest
-
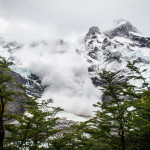
- Avalanche in Valle del Frances Mountains
-
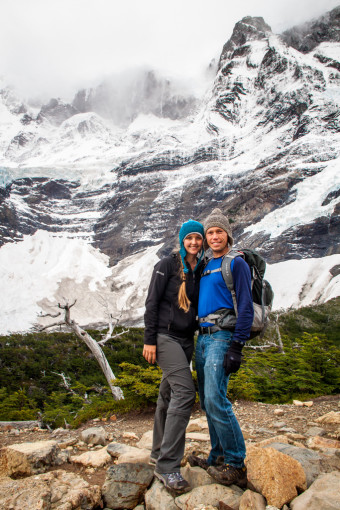
- Landon and Alyssa posing with snowy mountain at Torres del Paine
-
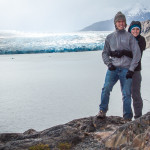
- Hugs at Glacier Grey
-
- Muddy Trails. Always muddy trails
-
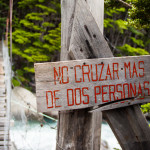
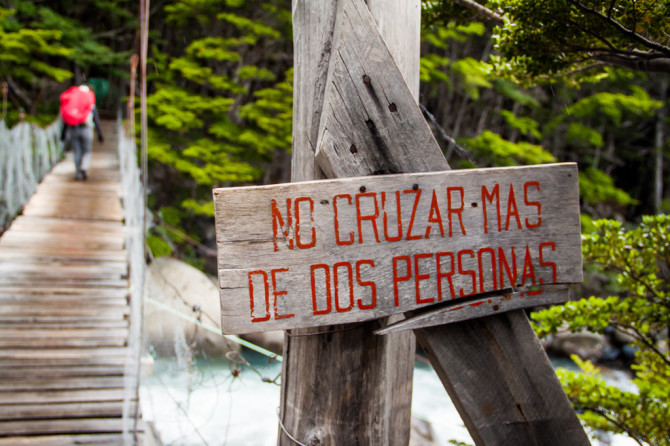
- Torres del Paine Bridge Warning Sign - No More Than 2 People at a Time
-
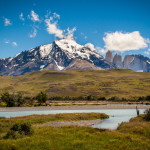
- Torres del Paine from Entrance
-

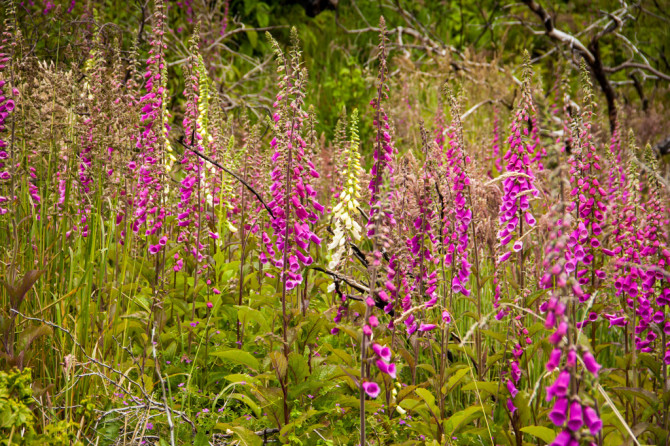
- Foxglove Flowers
-
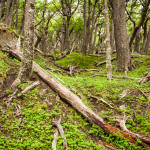
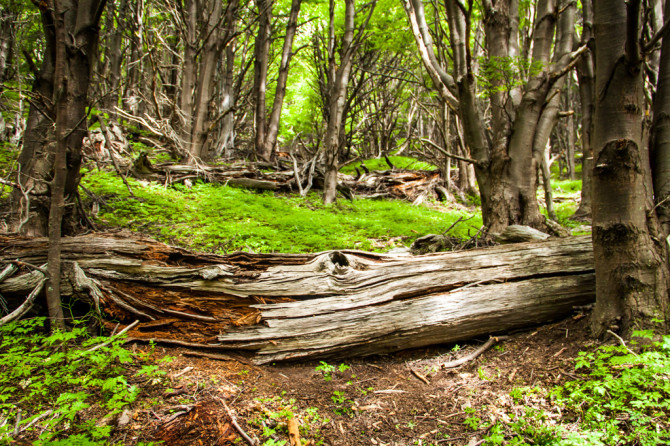
- Patagonia Forest
-
- Torres del Paine Flowers and Mountain
-
- Patagonia Distant Mountains
-
- Camping underneath the Torres del Paine
-
- Torres del Paine Map to the Mirador Viewpoint

-
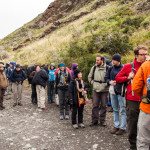
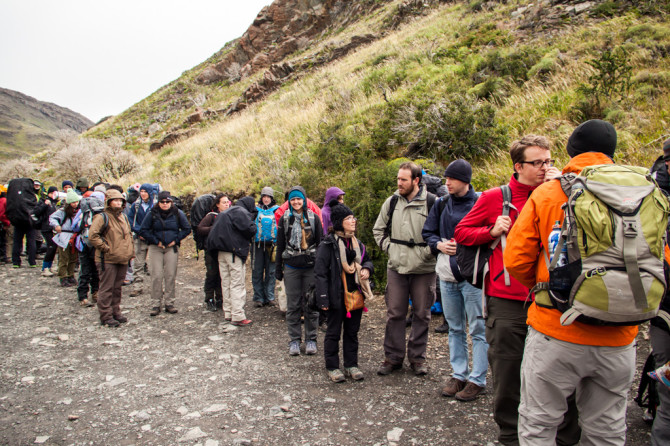
- Line of People Waiting for Ferry
-
- Torres del Paine from Lake
-
- Alyssa in Tent with Gourmet Meal


Great trip report Landon. Loved the mountain pictures, no signs of axes or crampons so I figure you didn’t have much ice to contend with. Looks like it was a good choice going this path and not the one you planned.
Thanks Steve! The trail was pretty thawed out at our elevation and didn’t have any steep or slippery parts. It’s pretty wide from all the people.
To do some real rock climbing on any of the peaks they get another $1,000 fee from you and require you to hire a park guide the whole time too!
Pingback: Chile, South America | Piece of Home
Exactly the information I was looking for in terms of itinerary! Thank you and well done!!!
Glad you found it useful. Enjoy your trip, it’s a beautiful place!
Thanks for the useful information guys! We’re headed there soon :)
Have fun! You will LOVE it!
Thanks for the great information! Were you fine with hiking shoes, or were you wearing boots? Wondering if the ankle coverage is necessary or not. Also, what month were you there? Thanks again!
We wore hiking boots. Mine did not have ankle coverage but Landon’s did. It depends on what you are comfortable with. There was a lot of mud and sometimes I was totally covered in mud. Some people had on huge boots up to their knees but I knew I didn’t want to hike in something so bulky and I was glad I didn’t! Overall, I didn’t have any problems with my feet or shoes. They were tired at the end of the trek, that’s for sure! We hiked in December, the weather was chilly, windy and a bit rainy but overall gorgeous!
Wow your adventure looks great! My husband and I are looking to go to Chile next year… We are both teachers and can only go July or August(yes we know their winter season, ahh) What time of year did you go!?
Awesome! We went in December/January which is their summer and it was beautiful, although still snowy in the south. Winter there would be incredible too – lots of ski resorts if you’re looking for snow runs for skiing or snowboarding, and endless winter hiking trails for camping if you’re looking for solitude.
Wow your article very informative. Thanks for sharing such a useful post.